In today’s blog, we will be learning how to treat yourself to microdermabrasion treatment at home! Our previous blog post on lockdown skincare tips from our beauty expert proved to be a hit! So we’ve decided to start a series on beauty tips from home.
So let’s get right into it!
What is Microdermabrasion?
For those of you who don’t know, microdermabrasion is simply the buffing of the skin. The treatment is non-invasive, an excellent choice for those of us with busy schedules. The buffing removes the dead skin and is useful as microdermabrasion speeds the shedding of dead skin cells.
If you’ve been to a nail salon before, it is similar to how they use a buffer to buff the nails.
Microdermabrasion is combining 2 methods for facial rejuvenation, mechanical exfoliation and vacuum suction, with the mechanical exfoliation we have all those benefits you mentioned, buffing the old cells away and they are replaced with newer healthier cells and the skin got that amazingly fresh look, and on another side that evens out the skin tone. With the Vacuum suction, we are draining any toxins away too, due to helping the 2 circulatory systems blood and lymph. When we improve blood circulation we bring the fresh nutrients to the surface of the skin, and with suction, we help the lymph to drain the toxins away
How Microdermabrasion Benefits the Skin
Microdermabrasion is a gentle, non-invasive exfoliation treatment that removes dead skin cells from the skin’s surface. Clearing this dull, built-up layer helps reveal a smoother, brighter complexion almost immediately.
Microdermabrasion gives:
- Smoother texture: Softens rough patches and makes skin feel more even.
- Brighter glow: Reduces dullness so skin looks fresher and more radiant.
- Unclogs pores: Helps lift debris that can contribute to congestion and breakouts.
- Fades mild marks over time: Can gradually improve the look of light acne marks and uneven tone with a series of sessions.
- Boosts product absorption: Skincare can penetrate better after surface buildup is removed.
- Supports collagen stimulation: The mild resurfacing can encourage skin renewal, which may help with the look of fine lines.
Types of Microdermabrasion
1. Crystal Microdermabrasion
Crystal Microdermabrasion is the more popular form of microdermabrasion and has been around longer. When treated using crystals, super-fine crystals pass through the microdermabrasion machine to a glass or stainless steel wand. The wand sprays the crystals over the skin, similarly to sanding for your skin! The wand then vacuums up the crystals and exfoliated skin particles.
When treated by a professional, they discard the used crystals after each treatment!
2. Diamond-Tip Microdermabrasion
Diamond-Tip Microdermabrasion is a newer method and is usually the chosen method for at-home treatments. It is safer as there is no chance of crystals accidentally getting into the eyes. Some also argue that it is cleaner as there are no stray crystals left on the skin.
Rather than crystals exfoliating the skin, a diamond-encrusted tip attaches to the wand. The tip will pass over the skin, exfoliating before being vacuumed away. There are usually different tips that come with the machine. Each diamond-encrusted tip has different grit levels, finer the tip, the less harsh they are on the skin.
The fine tips are for use on the face, whereas the harsher tips, used for the body to treat stretch marks, etc.
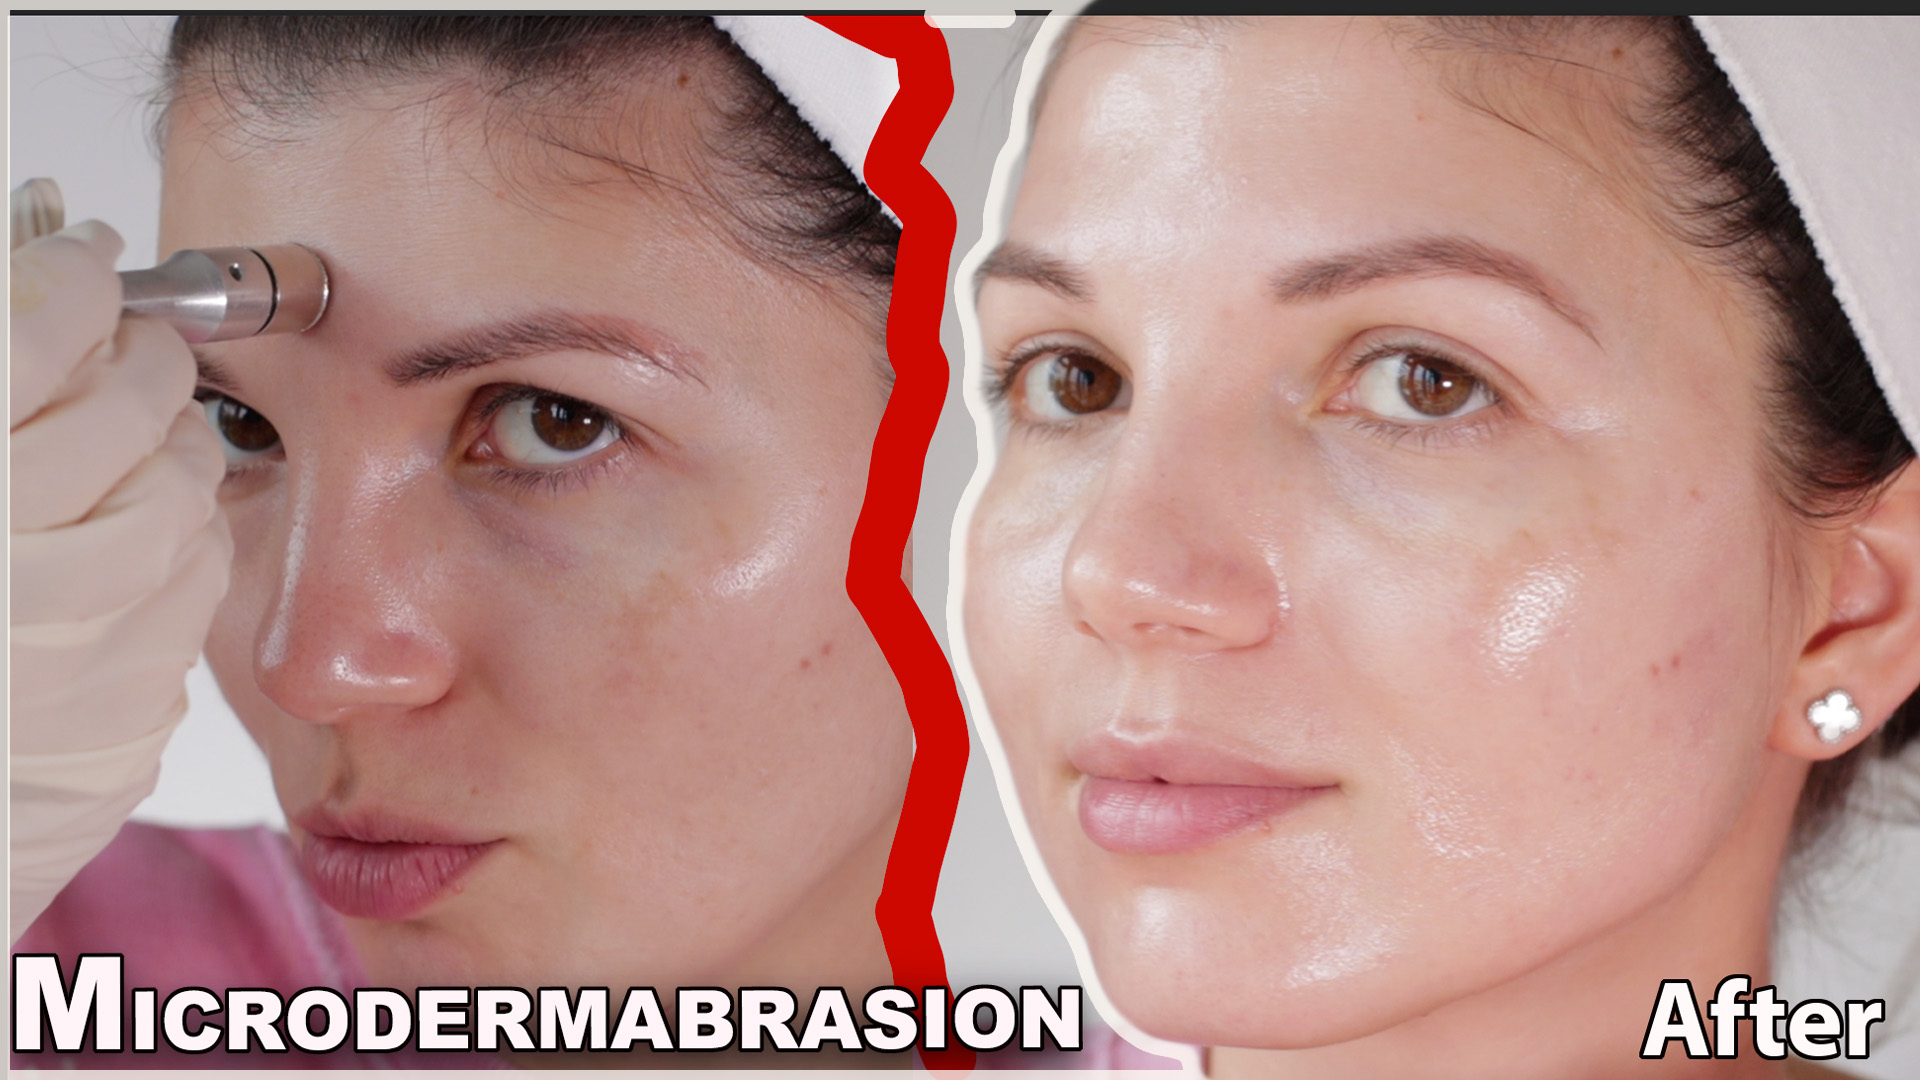
Now that we’ve explained the benefits of microdermabrasion, the process, and the methods. Let’s get started on how to give yourself the treatment at home. As mentioned, Eleonora will be using a Diamond-Tip Microdermabrasion kit, we’d recommend doing so also to follow along!
Ideal candidates for Microdermabrasion
The best candidates for microdermabrasion are people who are healthy and have small skin problems. They should also have realistic expectations about what the procedure can do. People with uneven pigmentation, clogged pores, acne, blackheads, fine lines, minor scars, and age spots can all benefit from microdermabrasion.
Microdermabrasion is not recommended for those with active keloids or warts in the treatment area, and procedures for pregnant women should be postponed until after the baby is born.
The years take a toll on your skin from exposure to harsh environmental elements, damaging agents, and collagen production slowing down with age. Even healthy habits like sleep and diet can’t prevent skin from looking dry, dull, and worn out.
Intervals between Microdermabrasion treatments
Your skin needs time to recover in between microdermabrasion procedures, so dermatologists typically recommend waiting two weeks between treatments. However, follow the directions on the product you’re using for the most accurate information.
Overusing the product can damage your skin, so only use it as often as recommended. The frequency of treatments also depends on your skin type, skin issues, and what you’re hoping to achieve.
How to Perform Microdermabrasion at Home: Step by Step Procedure
Microdermabrasion is a popular cosmetic procedure often performed in a spa or dermatologist’s office. However, you may be surprised to learn that you can perform microdermabrasion at home with the right equipment and procedures. Home microdermabrasion can save you time and money and can be just as effective as professional treatments.
If you’re considering home microdermabrasion, it’s important to understand the process and what you need to do to ensure optimal results. This blog post will walk you through the basics of home microdermabrasion, including how to choose the right equipment and what steps to take during the treatment.
Before we get started, it’s important to note that at home microdermabrasion is not suitable for everyone. If you have sensitive skin, are pregnant, or have any other health concerns, you should speak to your doctor before trying home.
Here, you can do home microdermabrasion with 6 easy steps:
1. Gentle cleansing
Cleanse your skin every day with a mild, oil-free cleanser that won’t irritate. Harsh cleansers can make your skin too dry and sensitive for microdermabrasion.
2. Skin drying
It’s important to pat your skin dry with a cotton towel before using a microdermabrasion machine to get the best results.
3. Using a microdermabrasion machine
First, turn on the microdermabrasion machine. Next, with your free hand, gently pull one skin area tight. Then, rotate the hand-held device onto your skin in an upward circular motion. Finally, make sure to do 1 or 2 passes only.
4. Treating your entire face
Repeat the entire process to your entire face.
5. Post-treatment care
After the procedure, use a toner to restore your skin’s pH levels, then apply the necessary skin care oils, lotions, or creams.
6. Moisturizing for optimal results
Moisturise thoroughly to hydrate your skin and reduce the reddening of its sensitive areas.
Here, we have put the step-by-step tutorial for performing microdermabrasion at home:
What to Avoid When Doing Microdermabrasion at Home
It’s important to be mindful of certain practices when performing microdermabrasion at home to avoid potential skin damage. Here are some things to avoid:
1. Don’t over-exfoliate
Excessive exfoliation can harm your skin. Avoid using your microdermabrasion device too frequently or applying too much pressure on a particular area of the skin, as it can potentially cause skin irritation, dryness, redness, and swelling. It’s recommended to perform microdermabrasion once every two weeks for oily skin and once a month for normal skin.
2. Don’t apply excessive pressure
When using an at-home microdermabrasion kit, be mindful of the pressure you apply. Pressing too hard can scratch the skin, causing redness and irritation.
3. Choose the right microdermabrasion device
Selecting the right microdermabrasion device is crucial for achieving effective and safe results. With numerous options available, it’s essential to do your research and choose a device that suits your skin type and needs. Look for features such as gentle exfoliation, applicator tips for different purposes, and user-friendly controls. Reading reviews and seeking recommendations from dermatologists can also help you make an informed decision.
4. Skip certain products
Prepare your skin for microdermabrasion by adjusting your skincare routine in the days leading up to the treatment. Avoid using retinoids, peels, or other exfoliating treatments for at least three days before performing microdermabrasion at home. Additionally, refrain from using vitamin C products at least one week before the procedure to avoid over-irritation.
5. Never skip sunscreen
It’s important to limit sun exposure before and after microdermabrasion treatment. Avoid the sun and use sunscreen at least a week before and after the procedure to prevent potential harm to the skin. The skin will be more sensitive after microdermabrasion, increasing the risk of sunburn and damage, according to dermatologists. We recommend using a broad-spectrum sunscreen with a high SPF 60 to nourish, soothe, and protect the skin post-treatment.
Enjoy the Benefits of Microdermabrasion From the Comfort of Your Home
So, now you know how microdermabrasion can be performed at home. Just make sure that you are an ideal candidate for microdermabrasion, follow the recommended intervals between treatments, and carefully follow the step-by-step procedure to avoid any potential damage to the skin.
With the right equipment and procedures, you can achieve professional-like results and enjoy the benefits of microdermabrasion from the comfort of your own home. For more beauty tips and expert advice, stay tuned to Ray Cochrane Beauty School.
FAQ’s
1. Is it okay to do microdermabrasion at home?
Yes, it is generally safe to do microdermabrasion at home, but it’s important to follow the instructions carefully and choose the right product for your skin type.
2. Are at home microdermabrasion kits any good?
Yes, many at-home microdermabrasion kits are effective at exfoliating the skin and improving its texture. However, results may vary, so it’s important to choose a high-quality product and follow the instructions carefully.
3. Do you put anything on your face before microdermabrasion?
Before microdermabrasion, it’s important to cleanse your face thoroughly and remove any makeup or skincare products. Some products may recommend applying a pre-treatment solution to prepare the skin for exfoliation.
4. How can I get the best results from microdermabrasion?
To get the best results from microdermabrasion, it’s important to follow the instructions carefully, choose the right product for your skin type, and use it consistently. It’s also important to protect your skin from the sun and follow a good skincare routine.
5. How often should I do microdermabrasion at home?
It’s recommended to perform microdermabrasion once every two weeks for oily skin and once a month for normal skin.