Imagine having a shiny, colorful, long-lasting manicure with acrylic nails. You love the glamorous look, but eventually, it’s time for a change or to give your natural nails a breather. Properly removing acrylic nails at home is crucial to prevent any damage to your real nails. Don’t worry, though – you can easily do it yourself with the right tools and a little patience.
This guide will show you a simple and safe method using acetone. Acetone is a common nail polish remover that helps break down the acrylic, making it easier to remove without harming your natural nails.
So, Let’s get started.
What You Will Need to Remove Acrylic Nails at Home?
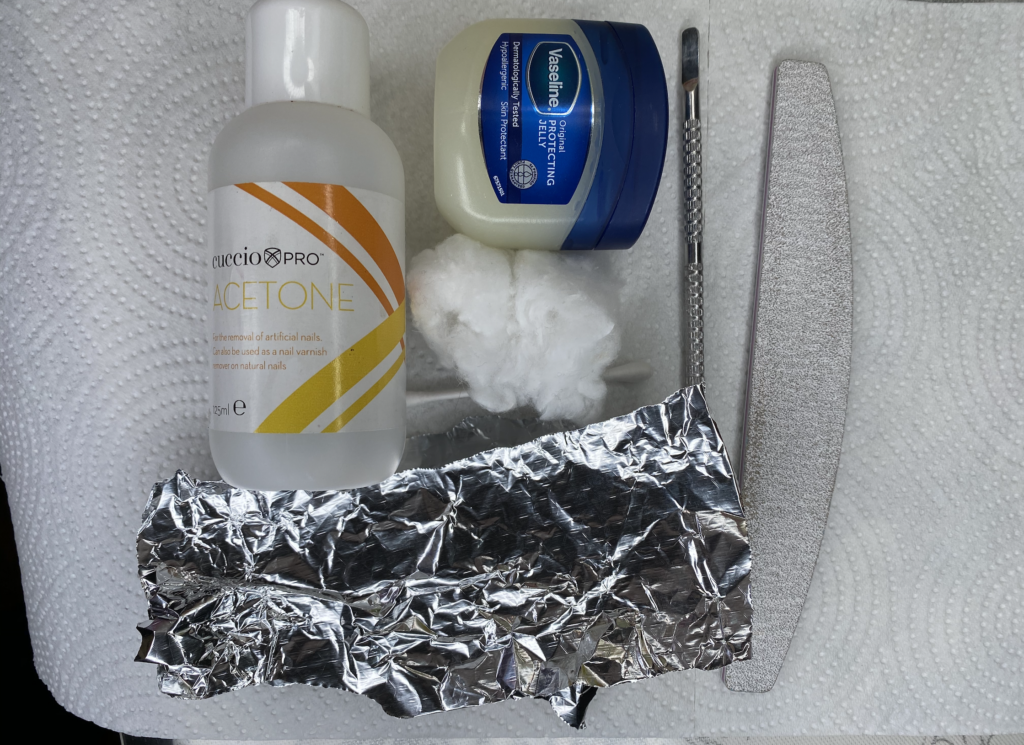
Gathering the necessary supplies is the first step in preparing the workspace for removing acrylic nails at home. Having all the required items ready before you begin the process will make it smoother and more efficient. Here’s a breakdown of the essential supplies you’ll need:
- Acetone: Acetone is a powerful solvent commonly used in nail polish removers. It helps break down the acrylic nails, making them easier to remove. Ensure you have enough acetone for the entire process.
- Cotton balls: You’ll need cotton balls to soak in acetone and place on each nail. They help deliver the acetone to the acrylic nails effectively.
- Aluminum foil: Aluminum foil helps in wrapping the fingertips after applying acetone-soaked cotton balls. This wrapping creates a seal that traps the heat, which speeds up the process of removing the acrylic nails.
- Nail clipper: Before beginning the removal process, trim your acrylic nails down. This step makes the process easier and minimizes the risk of accidentally snagging or pulling on long acrylics.
- Nail file: It is to file the top layer of the acrylic nails gently. This step helps the acetone penetrate the acrylic and makes removing it easier.
- Buffer block: After removing the acrylic nails, you can use a buffer block to smoothen the surface of your natural nails.
- Vaseline, cuticle oil, moisturizer: To massage and hydrate the cuticle and nails to avoid the dryness
Gathering these things beforehand allows you to complete the acrylic nail removal process without interruptions.
Once you have all the necessary equipment, make sure you’re in a well-ventilated area as acetone can affect your respiratory system.
(Note: Acetone is incredibly flammable)
Let us now know the step by step process to remove acrylic nails at home using acetone.
How to Remove Acrylic Nails at Home
It is very easy to remove acrylic nails at home with acetone, but you have to be patient and do it carefully. Here is a step-by-step guide on how to do it:
Step 1: Trim the Acrylic Nails (optional)
In the first step, you have the option to trim your acrylic nails using nail clippers. If your acrylic nails are excessively long, carefully cut them to a more manageable length.
Ensure not to trim too close to your natural nails to avoid causing any damage.
Trimming beforehand can make the subsequent removal process more comfortable and prevent any snagging or discomfort during the acetone soak.
Step 2: Buff the Acrylic Nails
Buffing the acrylic nails is the process of gently roughening the top layer of the acrylic nails before soaking them in acetone. This step is essential because it helps the acetone penetrate the acrylic material more effectively and speeds up the removal process.
To buff the acrylic nails, follow these steps:
- Choose a nail buffer or a fine-grit nail file.
- Gently move the buffer or file back and forth across the entire nail surface.
- Buff in one direction, not back and forth.
- Focus on the top layer of the acrylic nails.
- Stop when the surface appears slightly duller and less glossy.
By going through this step of cleaning, you make the surface of the acrylic nails more porous. This makes it easier for the acetone to break down the acrylic material. This can cut down a lot of the time it takes for the artificial nails to soften and be taken off, making the whole process faster and less likely to hurt your natural nails.
Step 3: Soak Cotton Balls in Acetone
Soak cotton balls in acetone by saturating them completely. Ensuring they are fully drenched but not dripping will allow the acetone to effectively penetrate the acrylic nails during the removal process. This step is very important because it softens the acrylic, which makes it easier to take off without hurting the nails underneath.
Step 4: Apply the Acetone-soaked Cotton Balls
In this step, you will apply the acetone-soaked cotton balls or cotton pads onto the surface of each acrylic nail. The purpose of this step is to allow the acetone to come into direct contact with the acrylic material, which will help soften and dissolve the nails for easier removal.
Here’s a detailed breakdown of how to apply the acetone-soaked cotton balls:
- Take a few cotton balls or cotton pads and soak them in acetone. You can do this by pouring an adequate amount of acetone into a small bowl and placing the cotton balls or pads inside until they are fully saturated. Ensure that the cotton is soaked enough to be wet throughout, but try not to make them dripping wet to avoid a mess.
- If you’re using cotton balls, you can gently separate them into smaller portions, enough to cover each nail entirely. For cotton pads, you can cut them into smaller pieces so they fit better on your nails.
- Now, place the soaked cotton ball or pad on top of one acrylic nail. Make sure that the entire nail surface is covered by the soaked cotton. You may need to press down slightly to ensure the cotton adheres to the nail.
- Repeat this process for all your acrylic nails, applying the soaked cotton balls or pads to each one.
It’s important to let the acetone-soaked cotton balls remain in place for a sufficient amount of time, usually around 20-30 minutes, to allow the acetone to work effectively on softening the acrylic nails. This soaking process will help you remove the acrylic nails more easily and with less damage to your natural nails.
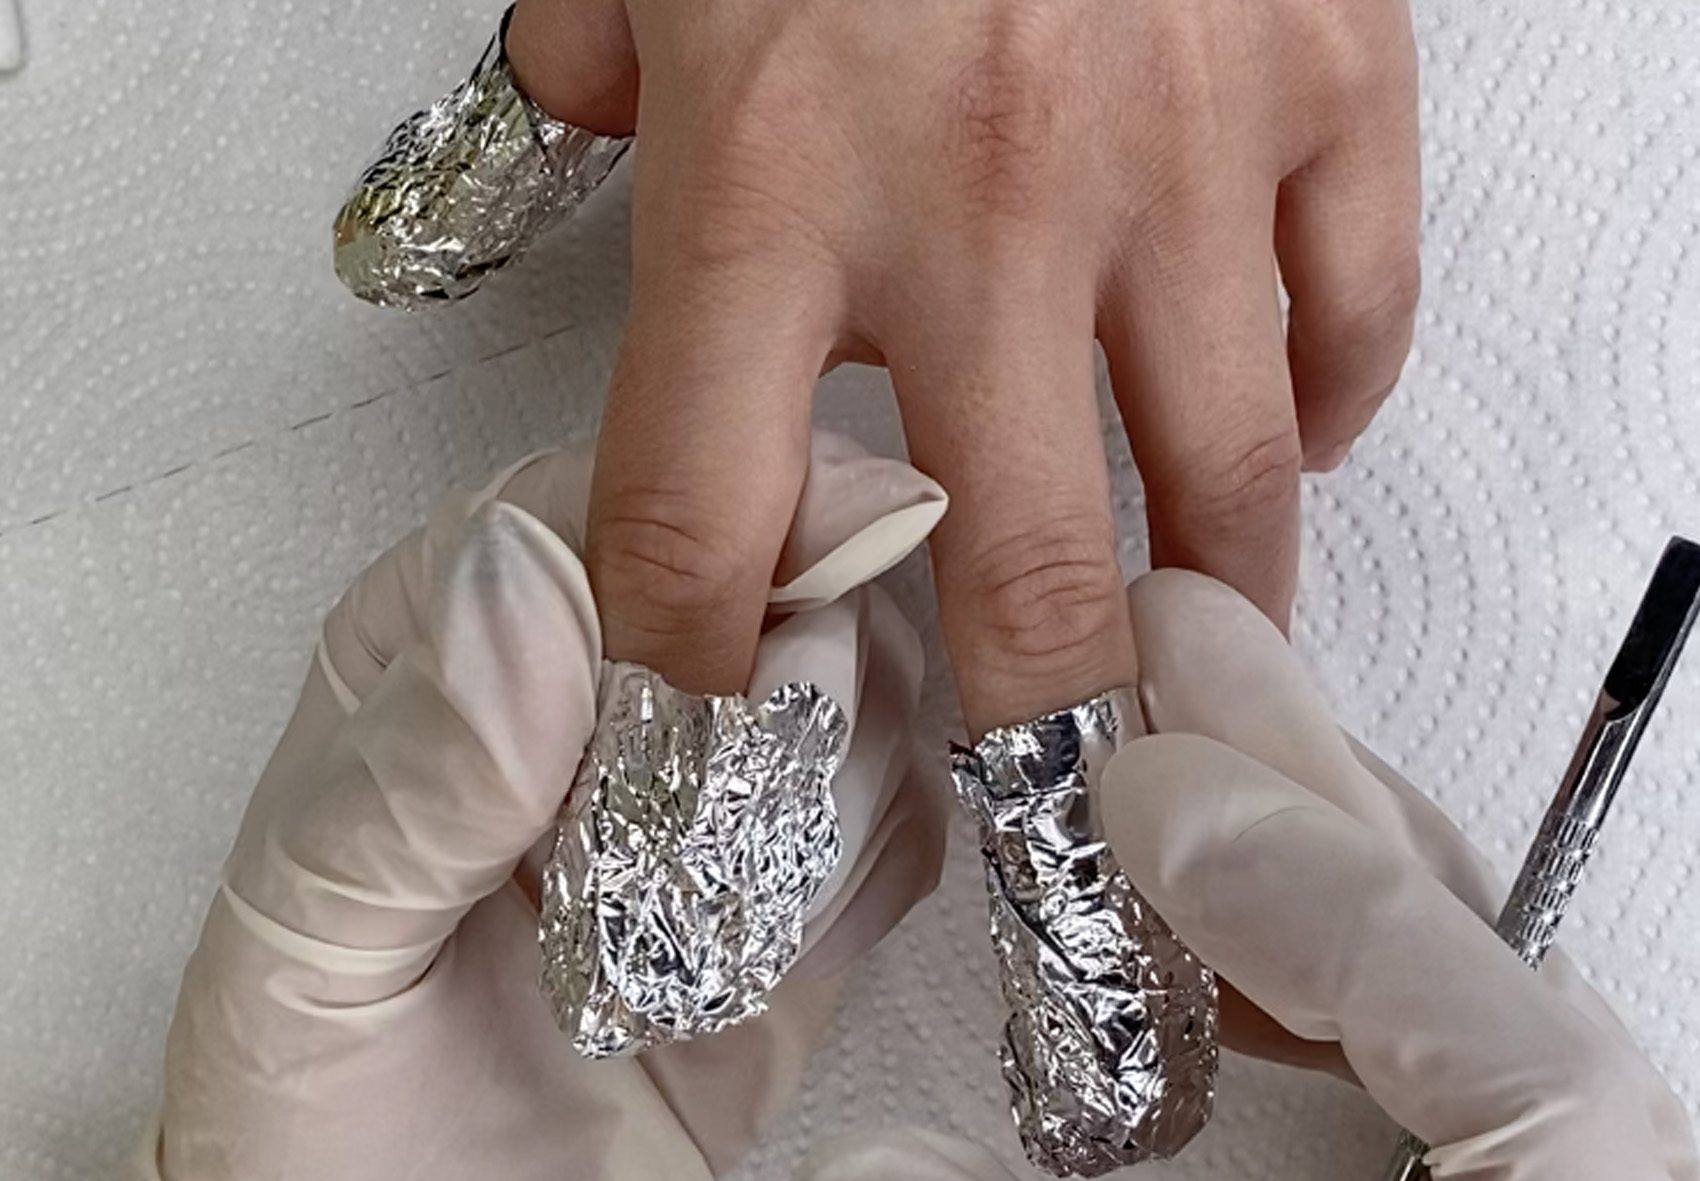
Step 5: Secure with Aluminum Foil
In this Step, You need to wrap each fingertip in small pieces of aluminum foil after placing acetone-soaked cotton balls on the acrylic nails.
The foil holds the cotton balls in position, ensuring complete coverage, and creates a sealed environment that helps retain heat, accelerating the acetone’s dissolving action on the acrylic.
This process aids in softening the acrylic nails, making them easier to remove without damaging the natural nails underneath.

Step 6: Wait and Let the Acetone Work
After applying acetone-soaked cotton balls or pads on the acrylic nails, you need to wait for approximately 20-30 minutes. During this time, the acetone will start to break down the acrylic material, making it soft and easier to remove.
The aluminum foil helps retain heat, aiding the process. After the waiting period, the acrylic should be soft enough to be gently pushed off with an orangewood stick or cuticle pusher, without causing damage to your natural nails.
Step 7: Check the Progress
After soaking your acrylic nails in acetone for about 20-30 minutes, you remove one foil to check the progress. Gently test if the acrylic has softened and is beginning to lift. If it’s still hard, rewrap and give it a few more minutes to continue dissolving.
Checking the progress ensures that you don’t remove the acrylic prematurely, which could lead to damage and difficulty in removing the rest of the acrylic.
Patience is crucial to achieve a successful and safe removal of acrylic nails.
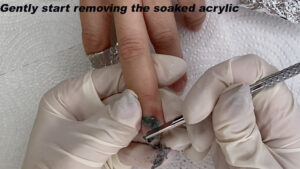
Step 8: Remove the Acrylic Nails
Once you have allowed the acetone to soften the acrylic nails, it’s time to remove them. Here’s how to do it safely and effectively:
- Gently remove one foil at a time.
- Make use of an orangewood stick or cuticle pusher to gently push off the softened acrylic from your natural nails.
- Be patient and avoid forcing or scraping the acrylic, as this can damage your natural nails.
- If the acrylic is not coming off easily, rewrap the nail with the acetone-soaked cotton and foil and wait a bit longer.
- Continue removing the acrylic from each nail one at a time.
- Take your time and be gentle to protect your natural nails from any harm.
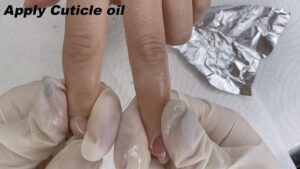
Step 9: Clean and Moisturize
After taking off the acrylic nails, wash your hands to get rid of any acetone and acrylic that might still be on them. Then, put cuticle oil or moisturizer on your nails and skin to help them get back to normal. This step feeds and moistens the nails, which keeps them from becoming dry and brittle.
Proper hydration helps nails grow in health and keeps them from breaking or getting damaged. It’s important to take care of your nails after removing acrylics so that they stay healthy and look good.
Removing acrylic nails at home with acetone can be a straightforward process if done carefully.
For easy to follow along with instructions, one of our experienced tutors has filmed a tutorial. Here’s our step by step tutorial on how to remove acrylic nails at home.
Remove Acrylics with Confidence
Removing acrylic nails at home with acetone can be a straightforward process if done carefully. Remember to trim or file the nails, soak them in acetone, and be patient during the removal process. Afterward, ensure to clean and moisturize your nails to maintain their health and appearance. However, if you are unsure or encounter difficulties, seeking assistance from a professional nail technician is always a wise choice. With proper care, you can safely remove acrylic nails and support the well-being of your natural nails.
At Ray Cochrane Beauty School, we offer courses that will help aspiring nail technicians achieve their goals.
The VTCT Level 2 & 3 Nail Technician Course is one of our best selling courses that has been carefully curated to be fully comprehensive in teaching. Students will go from a beginner to advanced technician in as little as 10 weeks!
Plus, with the growing demand for skilled nail technicians, graduates can explore exciting job opportunities in the beauty industry through platforms like Jooble UK
Throughout the course students will learn about:
- Health & Safety considerations & regulations
- Hygiene & preparing the client, treatment room & trolley
- Anatomy & physiology: structure of the skin, structure of the nail
- Nail diseases & disorders
- Client consultations / contra-indications
- Manicure & Pedicure
- UV Gel Nail Extension
- Acrylic Nails Extension
- Nail Art
- Electric Files
- Nail Wraps